Sometimes you don’t like the background elements of your picture. You want to blur the background to make your picture more attractive. As you can’t crop your image, so you need to edit it.
Blurring image will give you picture a soft and focused look.Moreover, an unorganized background can ruin a beautiful picture. Its not about to choose the right lens, picture background matters.
You can blur background of your picture using Adobe Photoshop.
You will find many offline or online photo editors in the market. But Adobe photoshop is the best one.Here, we will have the details How To Blur Background In Photoshop.
Blur Background In Photoshop
Photoshop can create a perfect blur look to the background of photos.
Sometimes you can’t click a picture in bright light.
You can fix it with photoshop blur option. You can have a blur background creating a focal point.
Adding a blur in the background can drastically change the look of an image. It enhances the focus on the subject of your image also improves the quality. Because through blurring you can remove all the distracting elements of the background without hampering the image itself.
There is another advantage to blurring an image. If the background is very colorful it can shift your focus to the background from the subject. Having a blur on the background keeps the colors as they are and also makes the subject a focal point in the image.
Here, we will go through various kinds of blurs and how you can apply them. Stick with us to learn the different methods of using blurs.
Applying The Irish Blur
Iris blur is a great option to add some depth in your images. You can have a better-looking image instantly by using the iris blur. You can use it in various cases. You can create bokeh effects using lights around the picture with the iris blur filter. It’s one of the primary blur filters available on photoshop.
You can learn to use the iris blur filter quite easily. It mostly depends on the picture you are using and what you want from it. There is a lot of creative liberty with this one. So, don’t hesitate on using that at all. Let’s
Let’s know about setting up the Irish Blur in Photoshop
Open An Image
Go to the Adobe Photoshop.
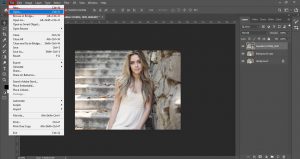
Then click the File option. Click the open button. Choose a picture from your PC or laptop gallery.
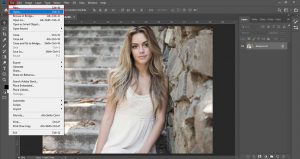
Go to The Blur Gallery
Click the Filter function from the menu. Then select blur gallery. You will find many blur options, Choose your preferred blur option. We will suggest you to choose the Iris Blur.
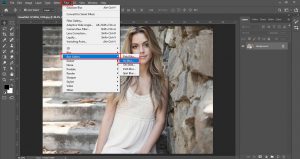
Applying The Irish Blur
Generating a focal point to the image, you can blur the left part of the image. Irish Blur is a great choice to blur the image properly.
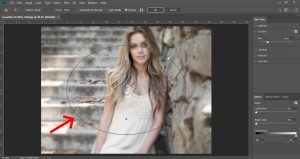
If you open the Irish Blur, then you will find a preview ring and some dots.
You will find a pin in the central point of the ring.
The pin represents the target. Fix your target. You will see a clear image of your focal point.
Rest of the picture is blur. Press the middle of the target pin.
You can drag the pin to the figure of image. Place the target.
Blur Portion
The blur target pin will help you to define the focal point. Set the focal point. Blur the rest of your picture.
Photoshop creates the first target for you. You have to set rest of the image. Click the pin to improve the blur of target pin.
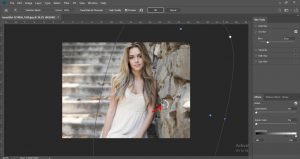
Set the first pin far from the focal point. It will give it most blurred look.
Blur Transition
You will find four larger white dots. The four larger white dots are blur transition portion.
Set the blur effect from 0 percent to 100 percent. Move the white dots to set the size of the blur transition portion.
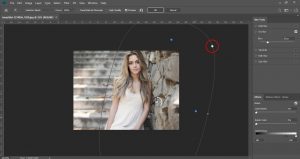
You can make the blur smooth dragging the dots close to focal point. You can make the blur strong dragging dots away from focal point.
Blur Amount
Set the blur knob. You will find it at the middle of the blur preview portion. Moving the blur knob clockwise enhance the blur.
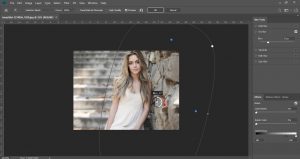
Moving the blur knob counterclockwise reducing blur amount.
You can use Blur Slider to set the blur. You will find the option in the Blur Tools Panel.
Final Touch
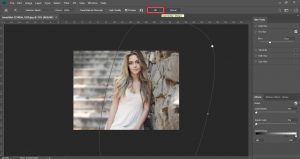
Finally, when you finish the edit. Go to the top of Blur Gallery option. Press the OK button.
Irish Blur is a unique and creative blur option of Photoshop.
Applying the Gaussian Blur
Well, if you want to reduce some details and noise from your background you can use the gaussian blur. It’s a pretty handy tool to get rid of all the distractions from your background. Many people use it as a smoothening method as well. The process behind this is very simple to do.
Here, we will know about the Gaussian Blur in Photoshop.It’s not very difficult to do. In fact, it is much easier than creating a depth of field through other blur filters. Let’s check out how you can do it.
Go To The File And Open
Click the File button from the menu of your workspace. Pick the picture you want to make background blur. Open the picture in Photoshop.
Setting Up The Gaussian Blur
Click and move the Background layer to the new Layer figure. You can find the option top of the Layers Panel.
Go to the filter option. Click Blur Gallery. Select Gaussian Blur
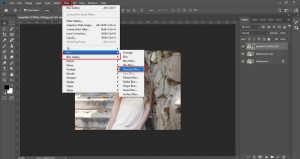
After selecting the Background layer, you will find the Gaussian Blur option.
Look at the preview. You can check the preview while applying the Gaussian Blur effect.
Set the Radius and check the preview. You can enhance the effect dragging the Pixels slider. You can follow the process to decrease the effect as well. Click OK.
Prolonged Blur
Using Gaussian Blur, you can blur the background as well as the other subjects.
If you want to set the Opacity, go to the bottom of Layers Panel.
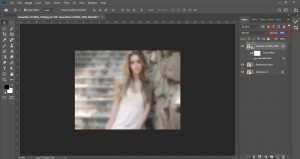
Choosing the Layer 1, it will enhance and decrease Opacity.
Setting up the Opacity. You will see the blur spreads to the subjects.
Blur With Layer Mask
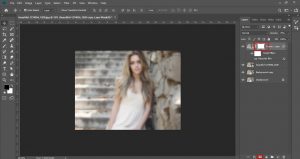
Go to the Layers Panel. Make a new Layer mask.
Click to the preview and select the rectangle with a round shape. This is the Layer Mask.
Go to the top of Tool Panel. The foreground color is the color of bottom. The background color is color of the back.
You can customize the color as per your need.
The Gaussian Blur effect will blur the background including subjects.
Check the Layers 1 layer mask. You will find the difference between real picture and blurred one.
Define With Pen Tool
Go to the Tool Bar. Choose the pen tool. Press the mouse and move the Pen Tool to outline the subject.
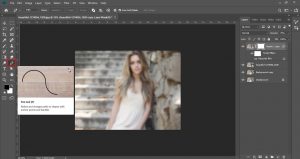
Set the Pen Tool inside of the picture. If you cutting the subject through Pen Tool, you can exclude the subjects from blurring.
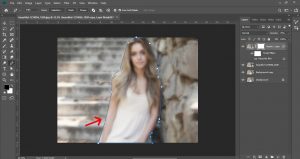
Making A Range Using The Pen Tool
Moving the layer to the New Layer logo. You will find New Layer Logo as a square with a doubled corner.
Make a range with the Pen Tool. Outline the subject.
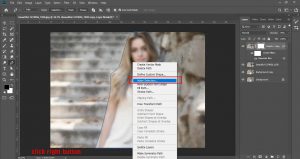
Click the right side. Select the range.
You will find Make Selection option. Choose the new selection.
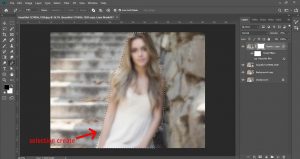
Hit Ok.
Final Touch
So, you will more options to edit the Gaussian blur. You can edit the blur as your requirements. Customize the blur effect. Click OK to confirm your edit.
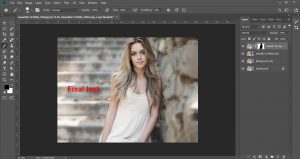
The Gaussian Blur has various options to blur the background.
Conclusion
Though there are more blur options, but these are highly recommended effects.
The Irish Blur will help you to create an exceptional blur effect. If you use it once, you will love it.
The Gaussian Blur effect will help you to create a classy effect. Gaussian Blur Effect is full of various options.
Choose between the blur effects and apply.
Using Photoshop, you can make the background of your picture.
Carry on.
Here are our previous articles for you, You can read